1970 E type Jaguar
Scroll down to see more of the progress pictures!
Project Status & Gallery
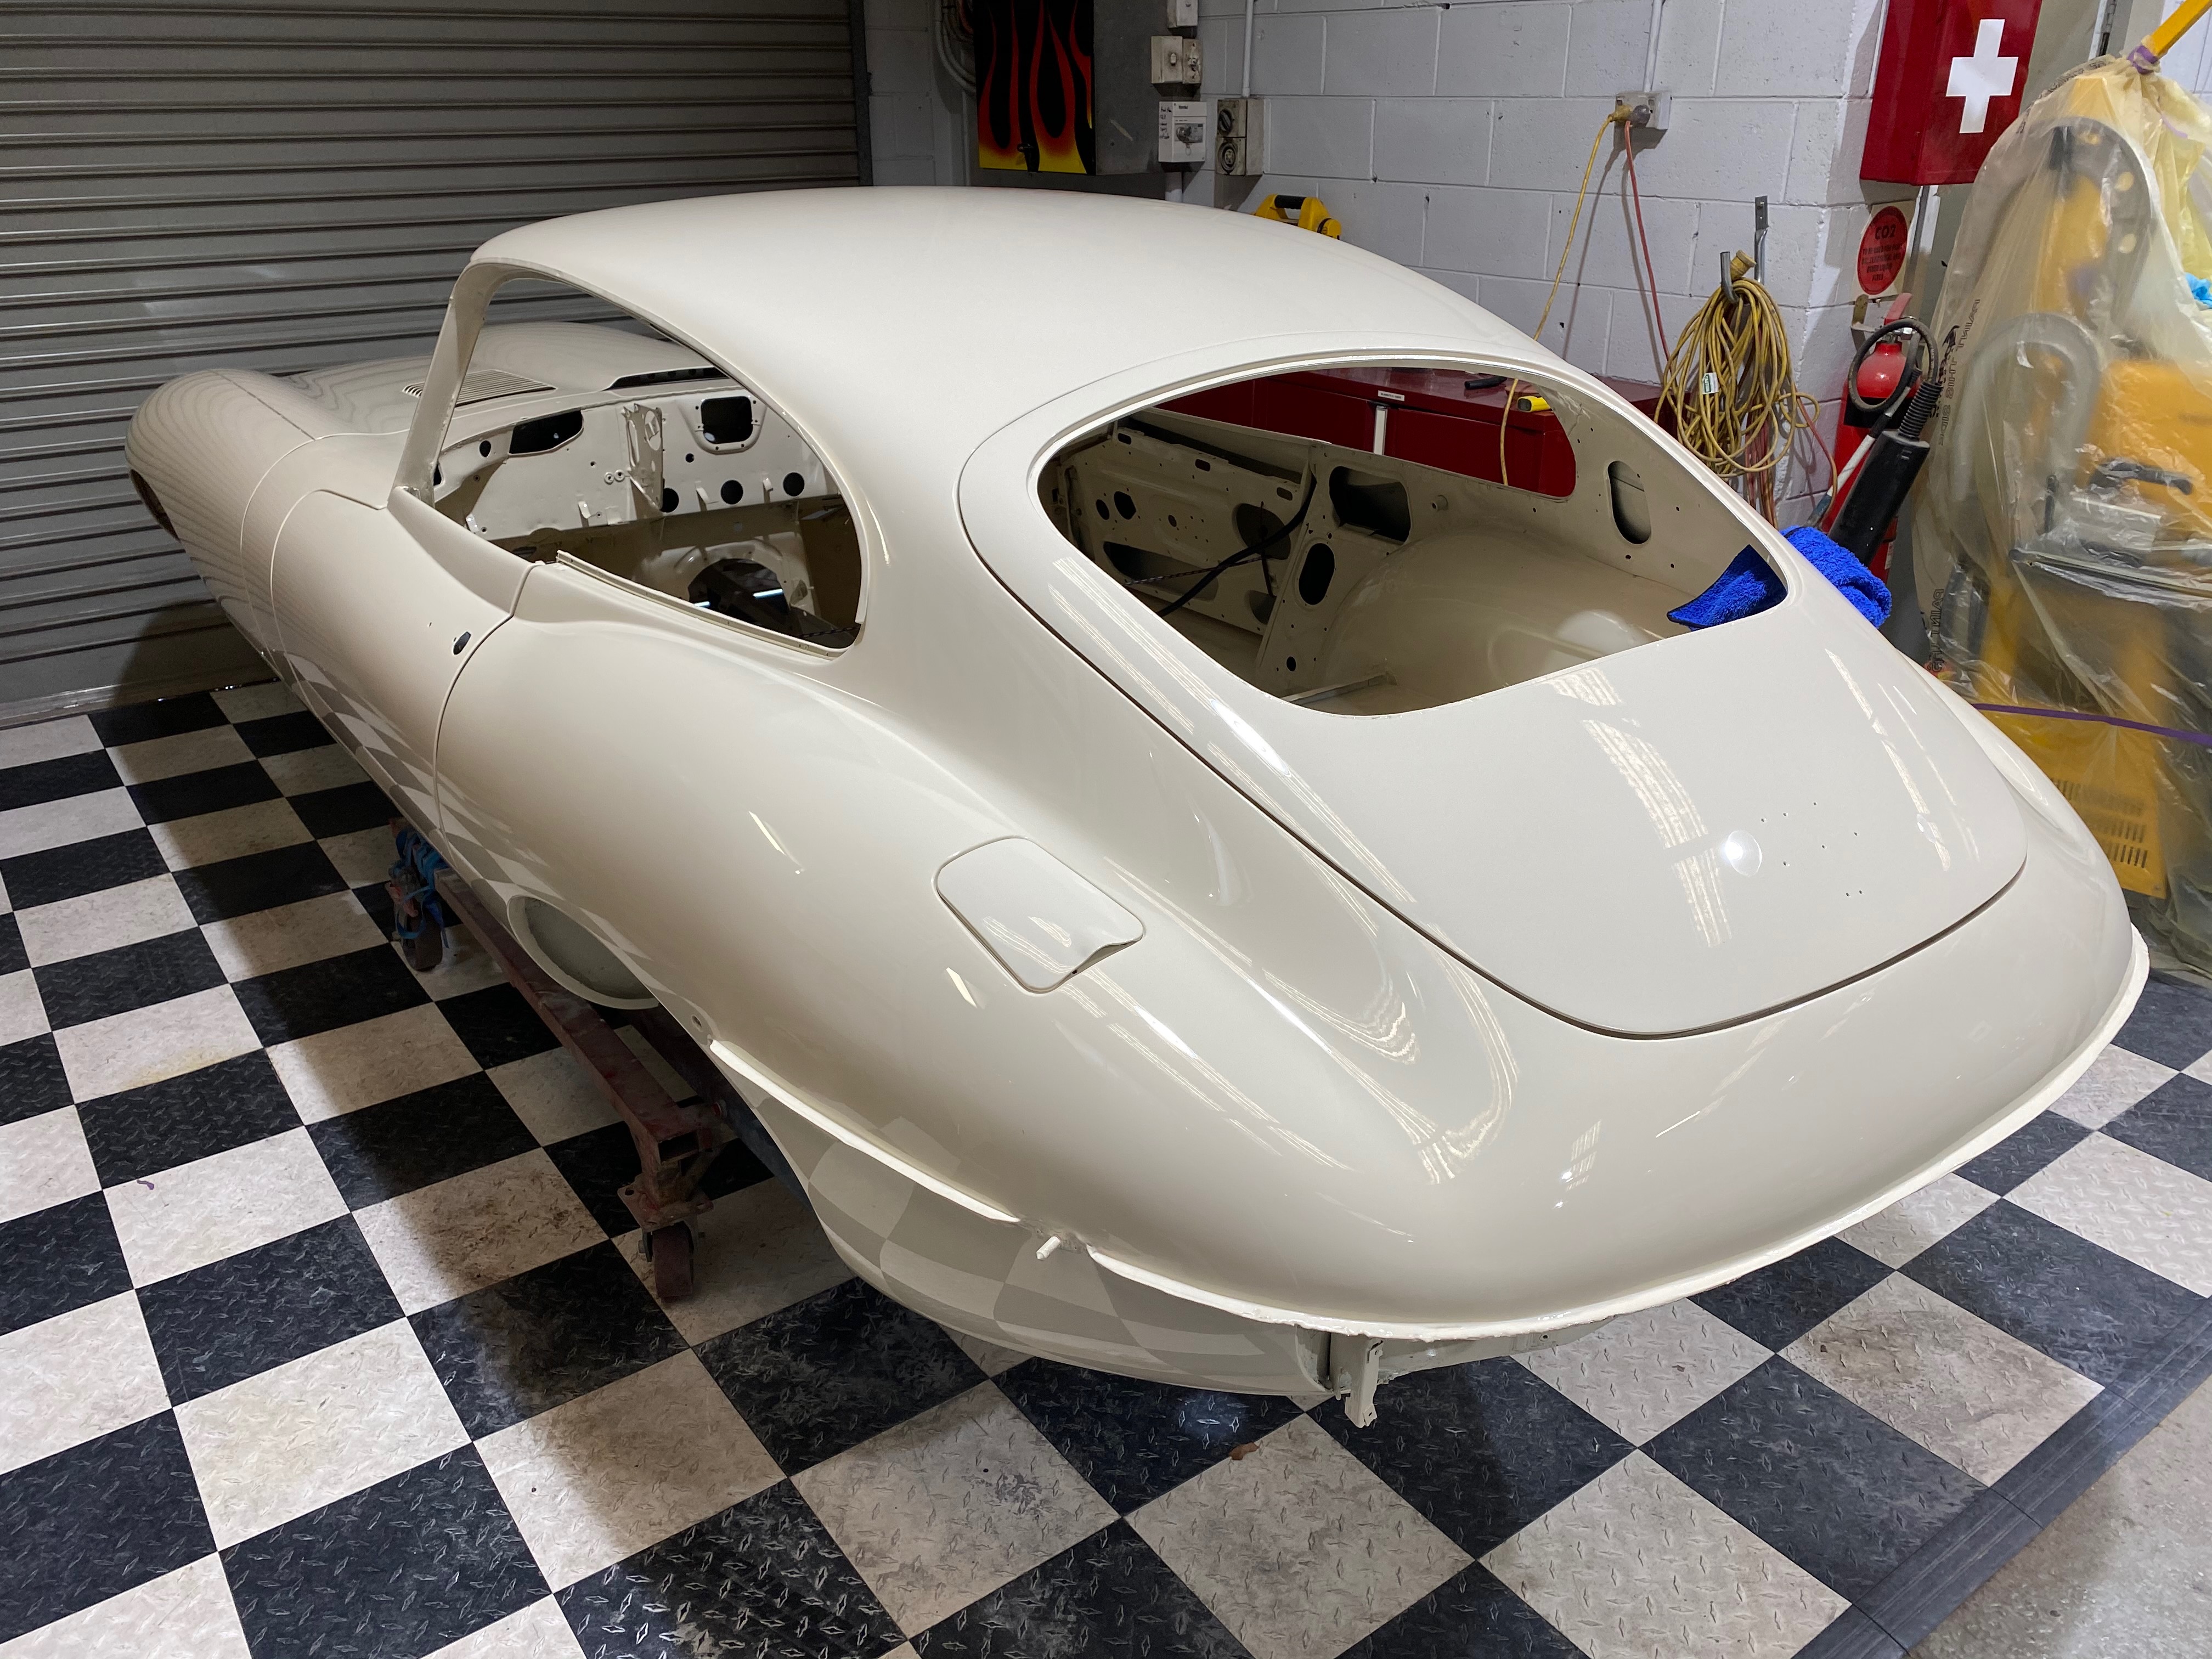
The E type is finally finished! After the paint had cured we wet sanded it to achieve a very flat surface with no orange peel or distortion and then buffed and polished it to a very high gloss finish. It was then assembled ready to go back to it’s owner for assembly, the hanging panels are only loosely hung in place at this stage as there was no point spending hours aligning everything perfectly only for the owner to remove them straight away. Pretty satisfying to look at the finished job and remember how far it came.


It felt like it would never come but finally it was time for the application of colour.
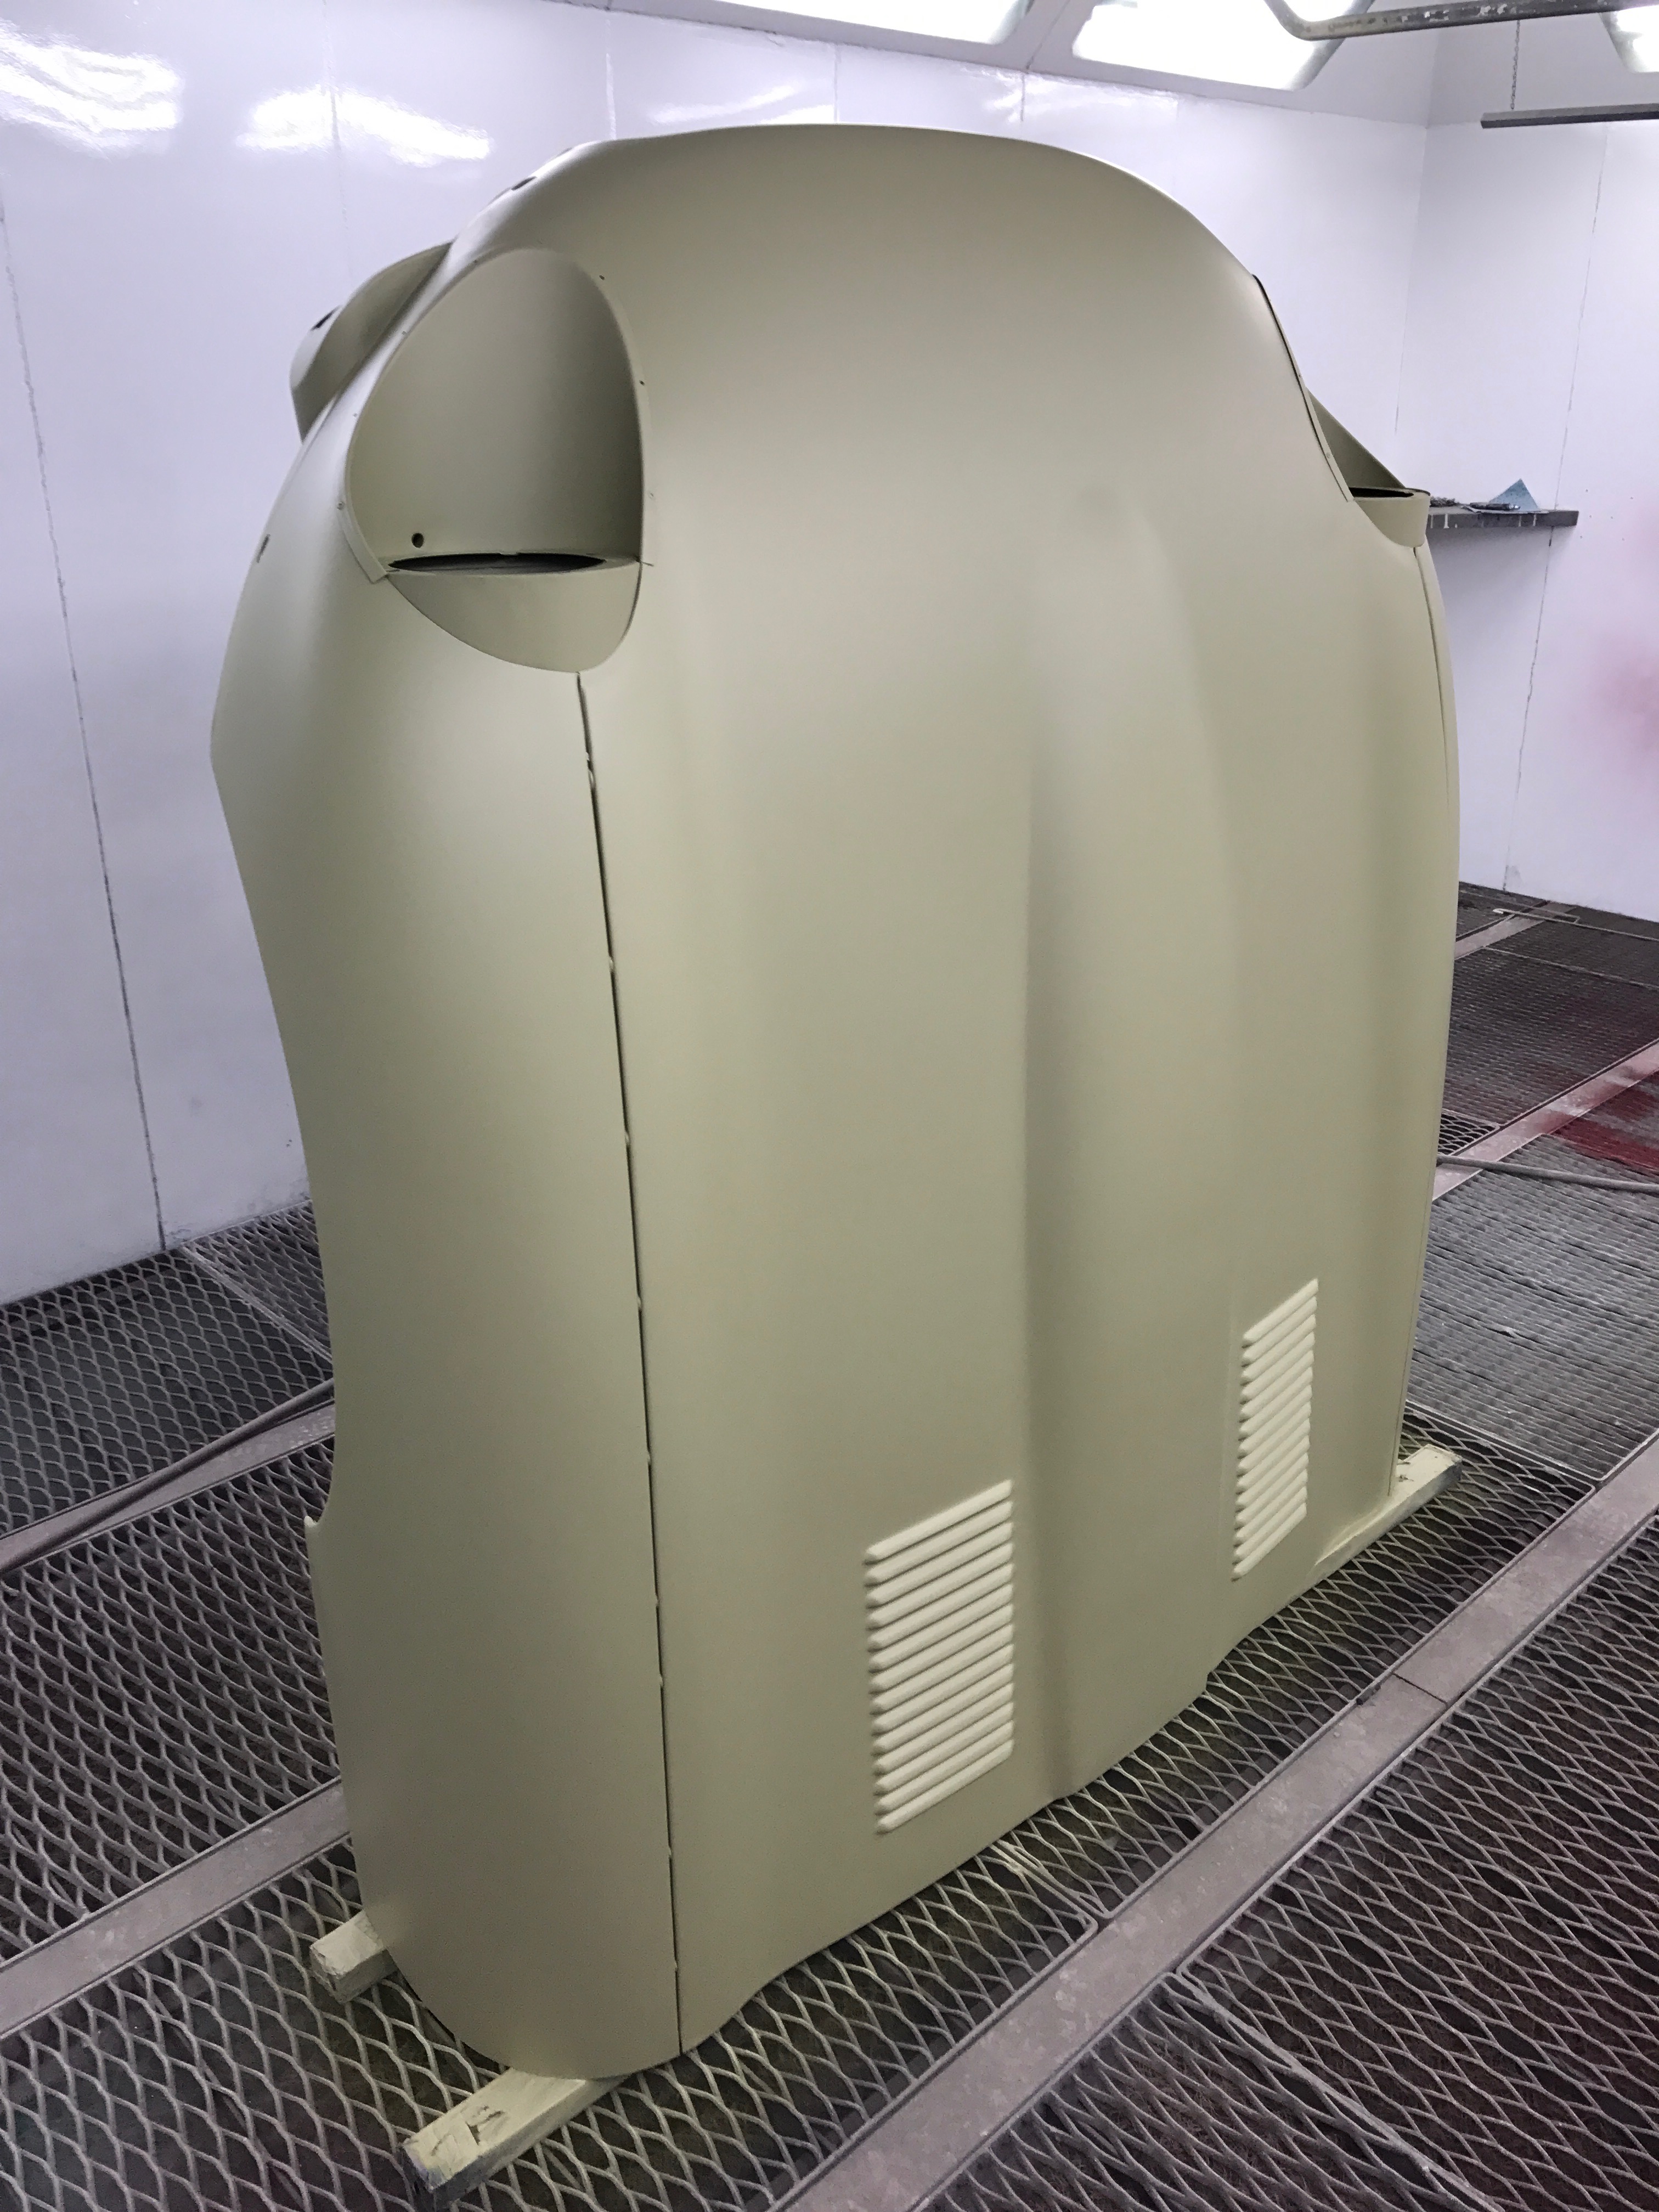
All the hanging panels and parts were done first. Then the body was very carefully seam sealed, epoxy primed and painted. More careful prep, cleaning and masking and it was time for colour on the outside of the body. Painting it this way gets a better finish than trying to paint the whole thing in one go. Painting in one go means dry spray all over the place. The bonnet was painted in the same way, inside first and then the outside in a separate session.


Then it was time for weeks of body dust and sanding to get the body as perfect as possible and all the panels flowing together perfectly. It was given many coats of polyester primer and then rubbed back over and over until we were happy. After that it was into hi fill ready for a final wet rub before colour.


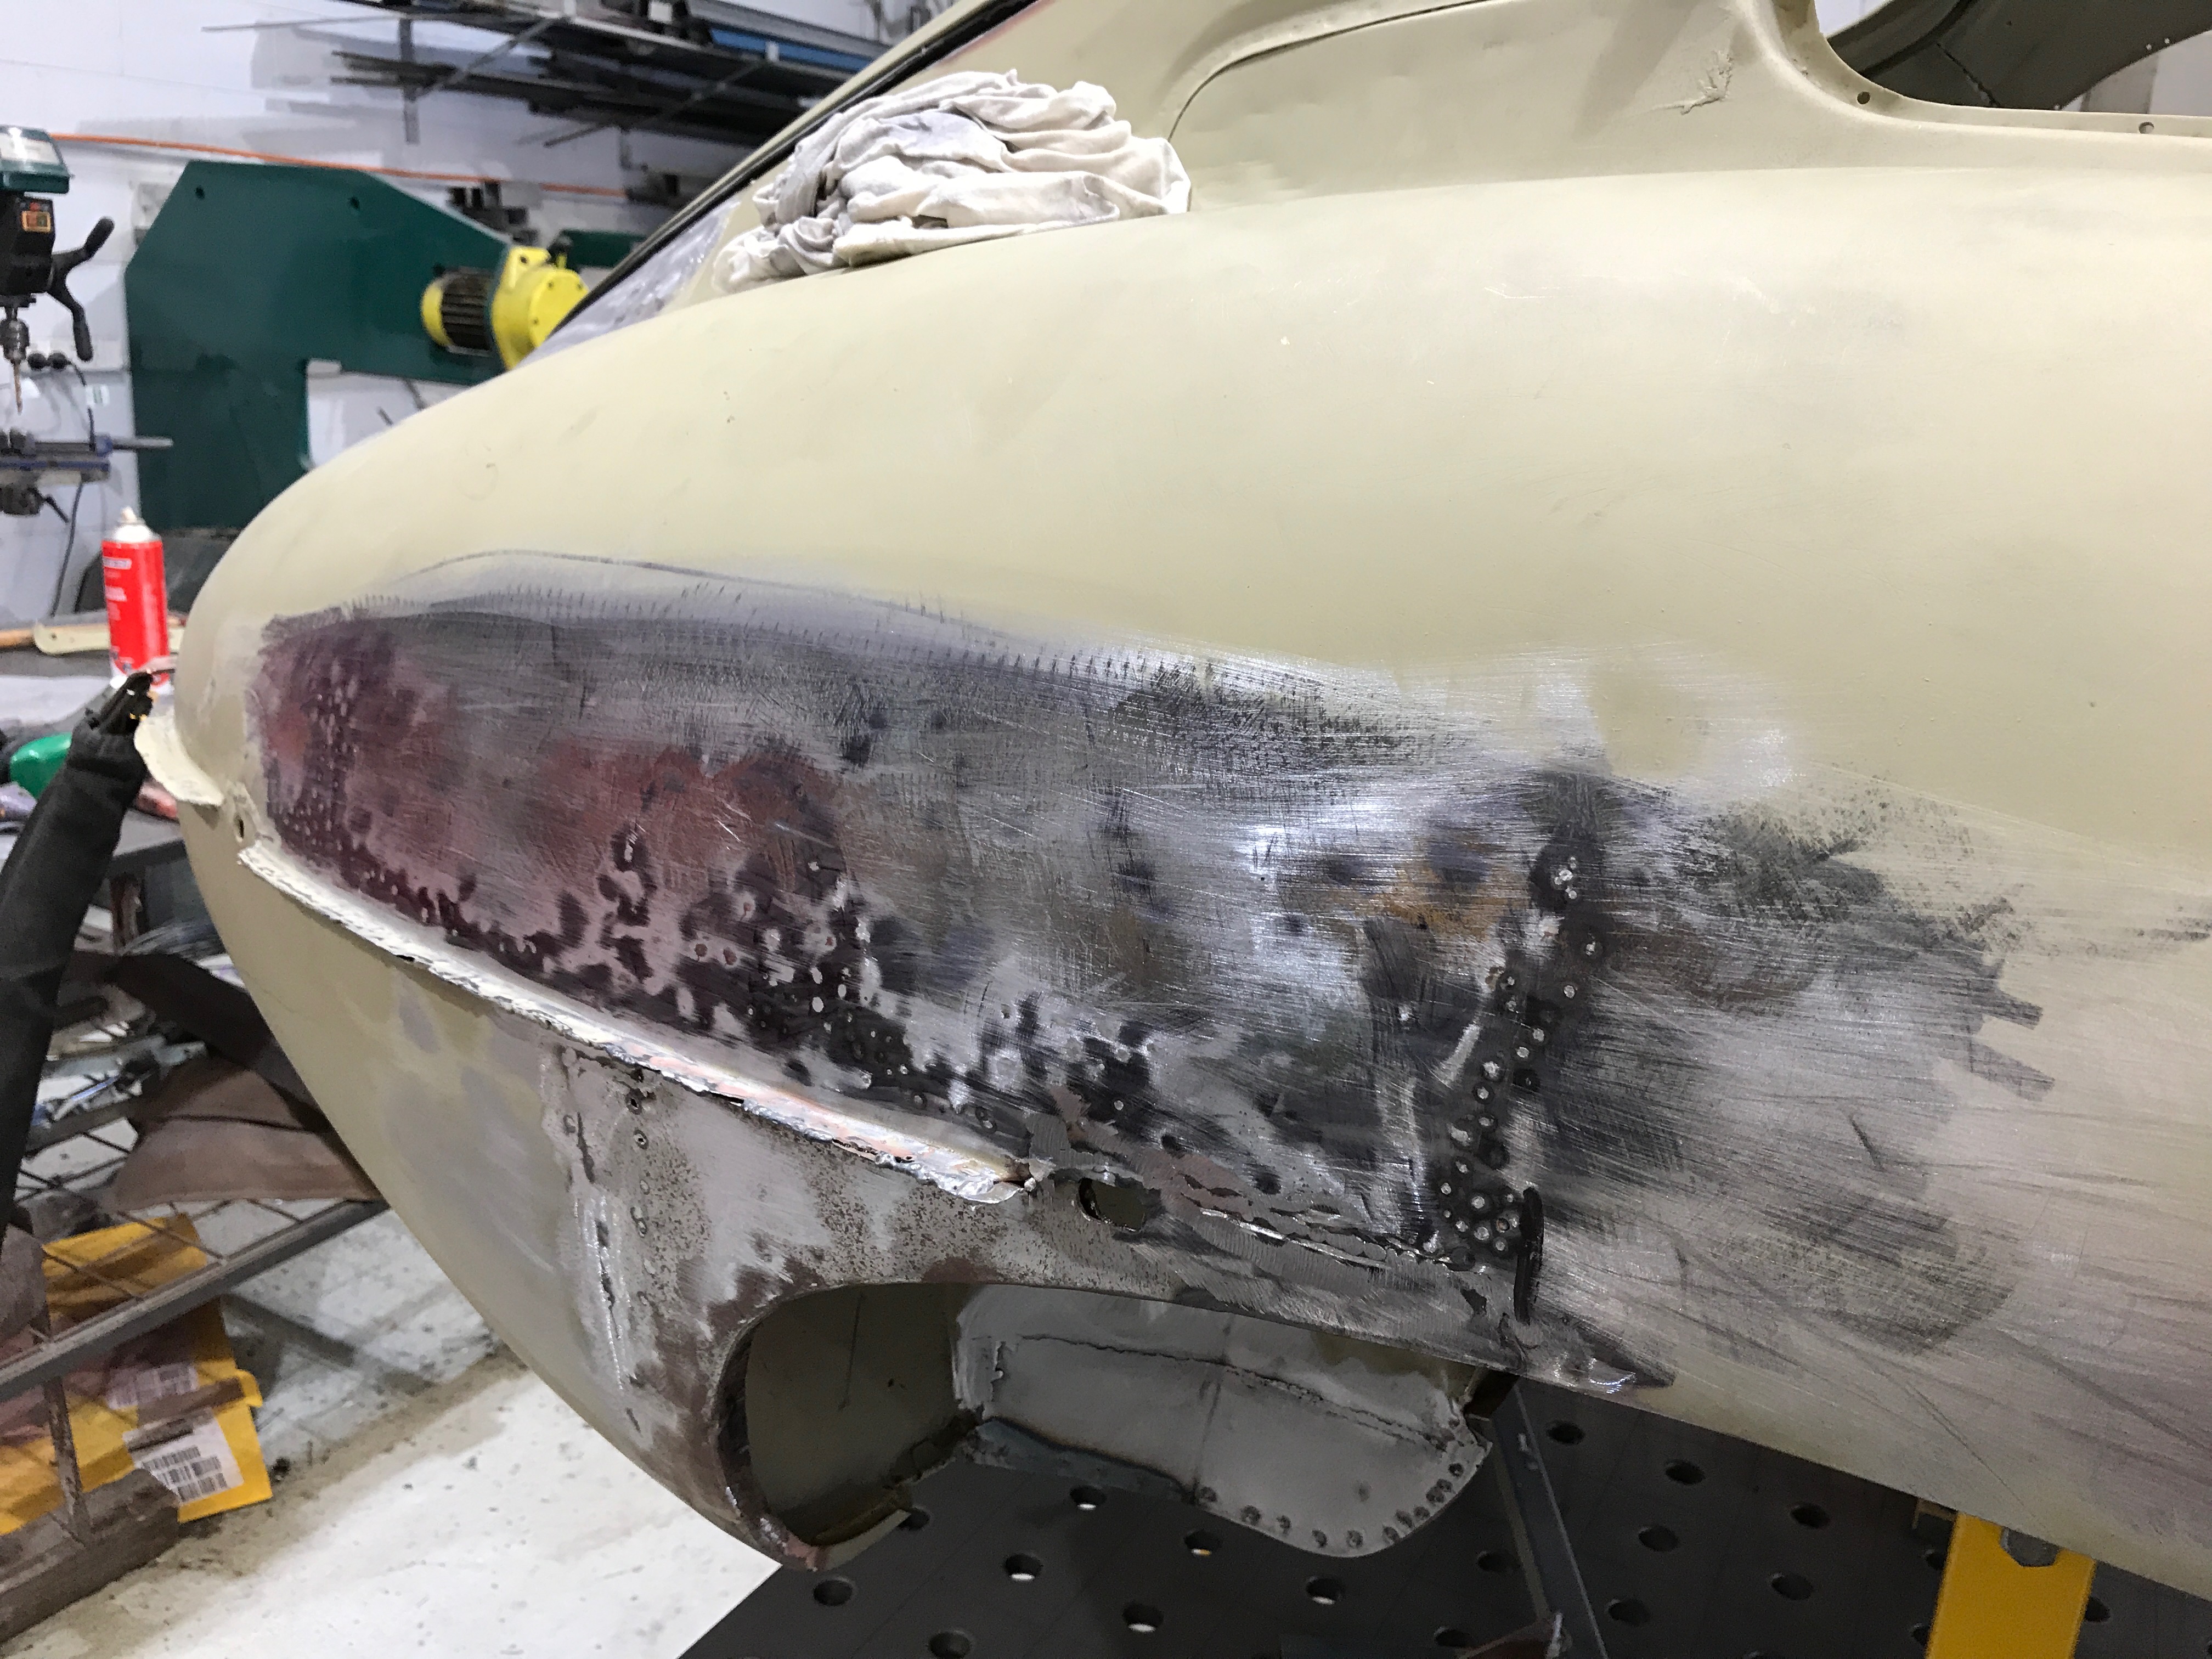
A lot of time was spent going around the body getting it as straight as possible in metal before we started the filler work. Here’s some of the process, this was a difficult area with quite a bit of damage, poor previous repairs and no access to the back side. In the end it’s still not perfect but it only took a very thin skim of filler to perfect the area.


There are always unexpected things that occur during a restoration and this was one of them. It turned out that the new bonnet had been very poorly assembled, we had to completely strip it down to sort out rust issues and prime it properly as well as re bond the inner structure mounting flanges. It was a lot of extra work but essential to make it a long lasting job. Once it was fixed it was re assembled and fitted to the car to ensure we had good gaps. The back edge of reproduction bonnets are left too long and have to be filed to length to get a good closing gap. This is a bit nerve wracking and required lots of very carefull measuring!


Starts getting scary here! The sills both cut off and in the process of cleaning up all the flanges and mounting points. When I went to fit the drivers door to check the gaps I found that the hinge was very worn,. There was a heap of free play in it meaning getting good gaps would have been impossible. I removed the old pin, turned up a new one slightly over sized, reamed the hinge to fit and welded it back together. Sounds easy right?!.. Everything has been painted with either weld through primer or rust proofing epoxy paint. Then once the car is finished we’ll fill all the box sections with cavity wax. It should outlast both the owner and myself!


The rusty boot floor and both front footwells were cut out and replaced. This involves a lot of trimming, cleaning up and repairing flanges and often making repairs to areas nearby the replacement panel. After that and all the little miscellaneous repairs were done it was time to remove the car from the rotisserie and put it on the Demmeler table to begin the major structural repairs. Mounting it on the table means that it’s much easier and faster to ensure that the car remains perfectly level and square while we’re working on it.
The table and my E type mounts confirm that the car’s straight and not bent or twisted. Good news!


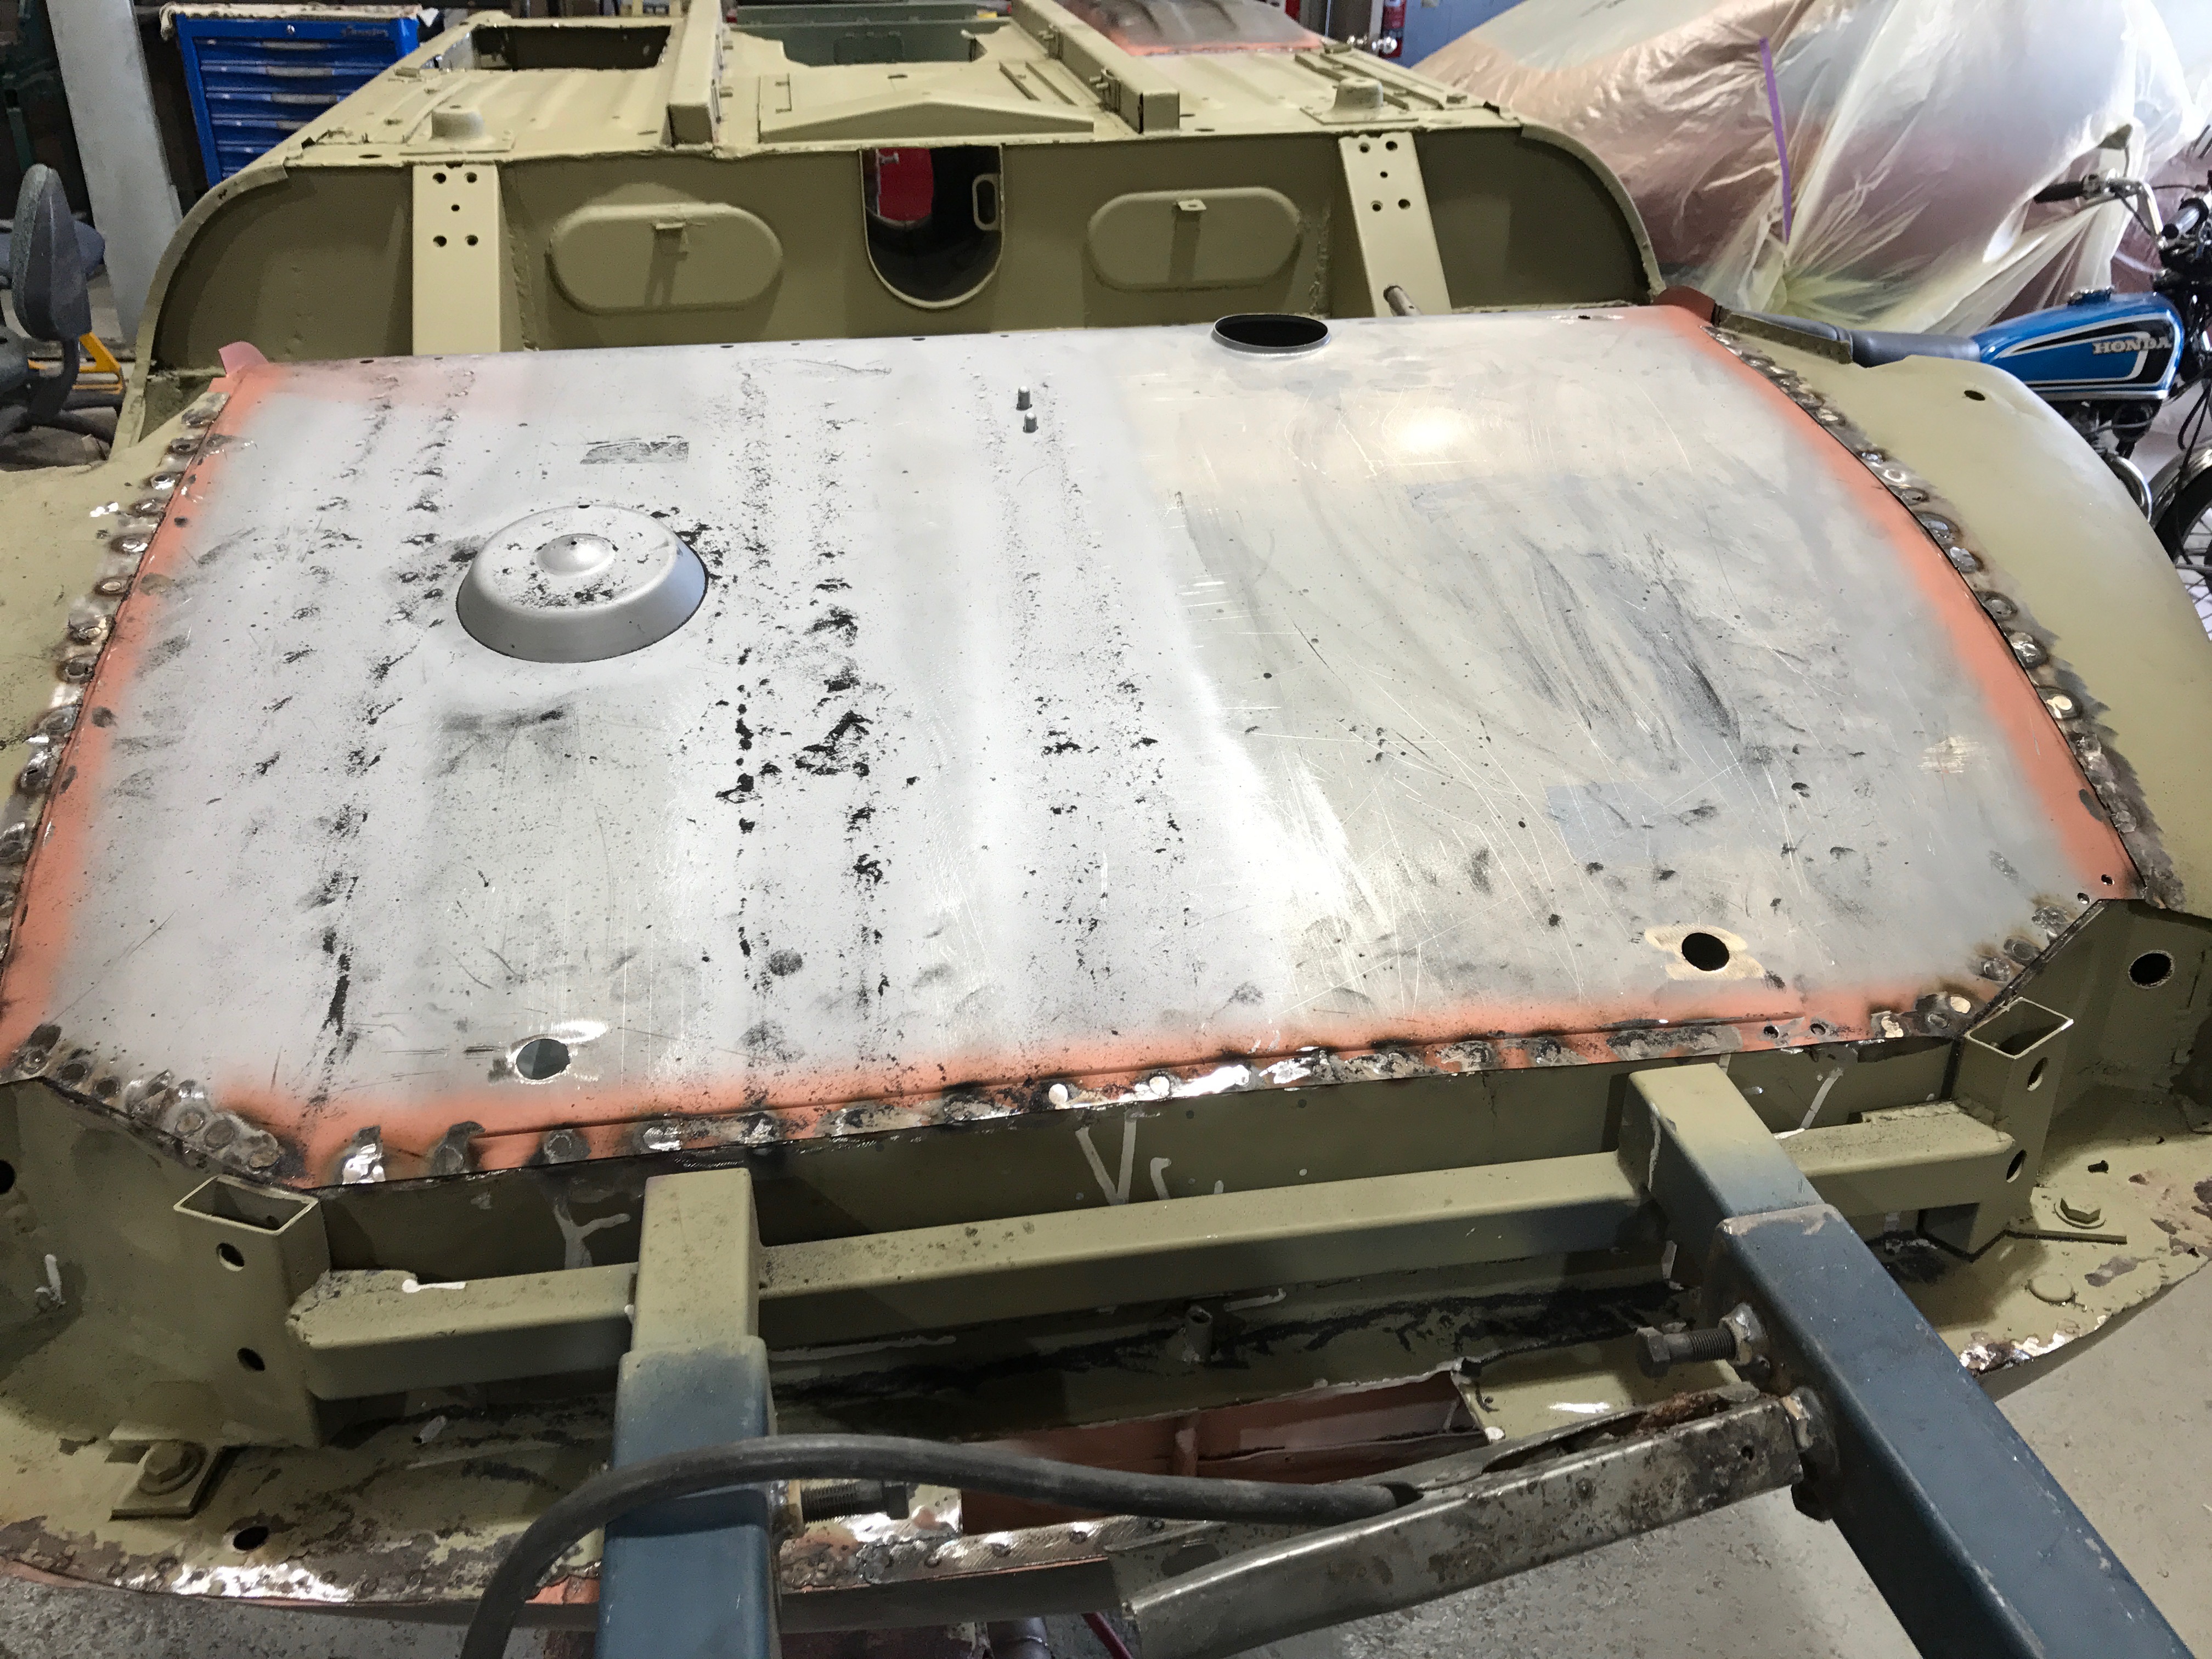


Even though the bonnet was a new replacement item we had to strip it to bare metal, it had some rust under the primer so the only way was to sand it clean. The bonnet would come back later to haunt us with another twist…
After stripping to bare metal it was scrubbed clean with deoxidene and prepped ready for epoxy primer.
The body shell arrived back from the blasters and was mounted on the rotisserie. There’s still lots of prep required after blasting before it can be primed. There was quite a bit of filler to remove, plus I melted out the lead in all of the joins, removed seam sealer and sanded the outside parts smooth – plus removed about 20kg of left over garnet from the blasting!
Then it went into the booth and was sealed with epoxy primer.
As is often the way, there was quite a lot more rust than we were hoping for. The blasting process is ruthless in uncovering issues! The major issues required replacement of the front footwells, boot floor and drivers inner and outer sills. Plus a lot of smaller repairs that were done using hand fabricated patches.
The fuel tank was chemically dipped to ensure perfect cleanliness on the inside and no future issues with clogged fuel filters. It got three coats of epoxy before the gloss black to give it the best chance of surviving long term.
We fabricated a new rear section to the car using the English wheel and then spot welded it in place as per the factory. As usual the back sides of all repair panels are painted before welding in place.


We started by stripping the car down, sending it off to be blasted and then sealing it up with epoxy primer. That means we can see exactly what we’re dealing with and it won’t develop any surface rust while we’re working on it. Then we assessed what was needed in the way of repair panels etc and started ripping into it. We hand stripped the roof and quarters so that the blaster just had to do them lightly, that way there was no chance of them being warped by the blasting. Even though I have trusted blasters there’s no need to take the risk…


